How to add an MX record to the personal account?
You should first check the NSs (Nameservers) that are configured in the personal account for the domain name: >> select the section called «Domains», >> then click on the wrench icon >> next to the desired domain, then go to the «Name-servers» section.
If NSs (Nameservers) are set by default: ns.adamant.net., ns3.adamant.net., ns5.adamant.net., then MX-record should be added/changed in the personal account.
Otherwise, when NSs (Nameservers) are set different from the above, and they send the domain name to any hosting server (shared web hosting), then it will be necessary to configure MX-record in the control panel on that hosting where they direct it.
For example, if NSs (Nameservers) are configured as follows: nsda6.adamant.ua. and ns6.adamant.ua., they direct the domain to the hosting server DA6 (shared web hosting), and it will be necessary to add or edit MX record in the control panel on this hosting server, not in the personal account.
How to add an MX record (Mail exchanger record) to the personal account?
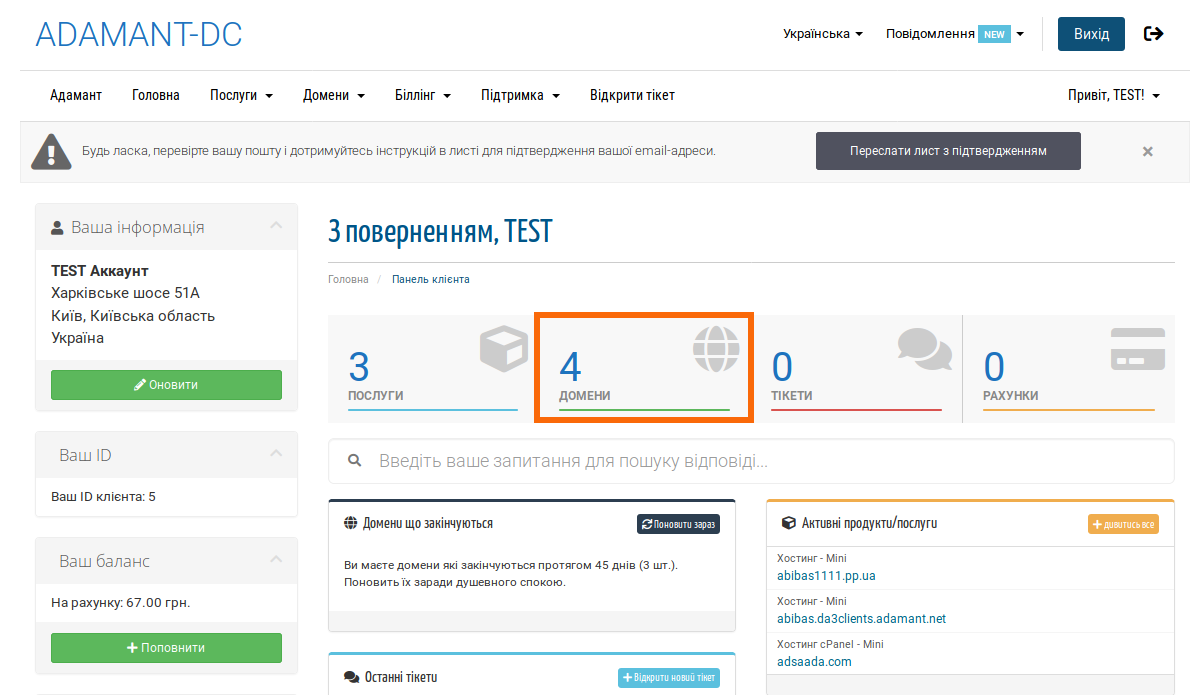
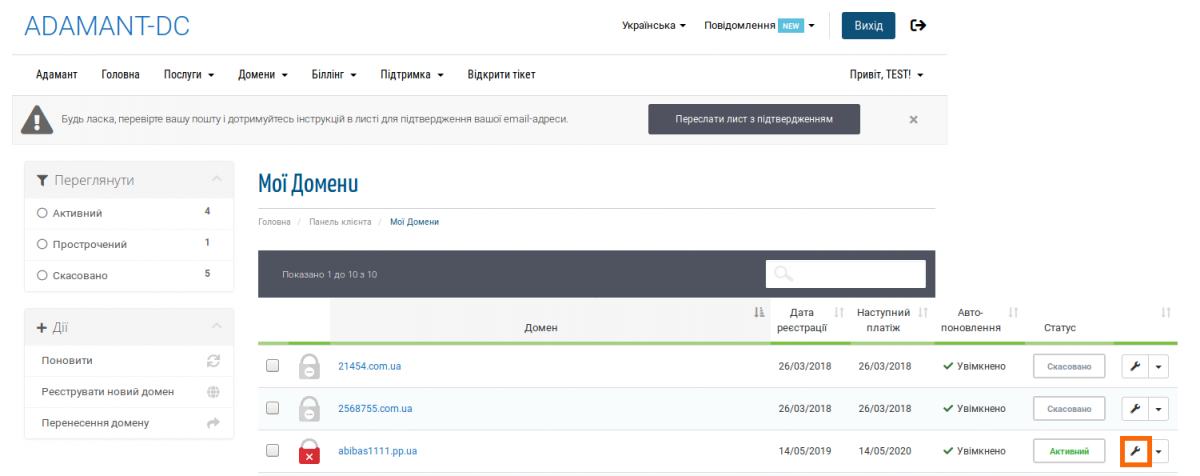
- Select the Domains section;
- Next to the desired domain, click on the wrench icon;
- On the left you will be able to go to the «DNS Management» section;
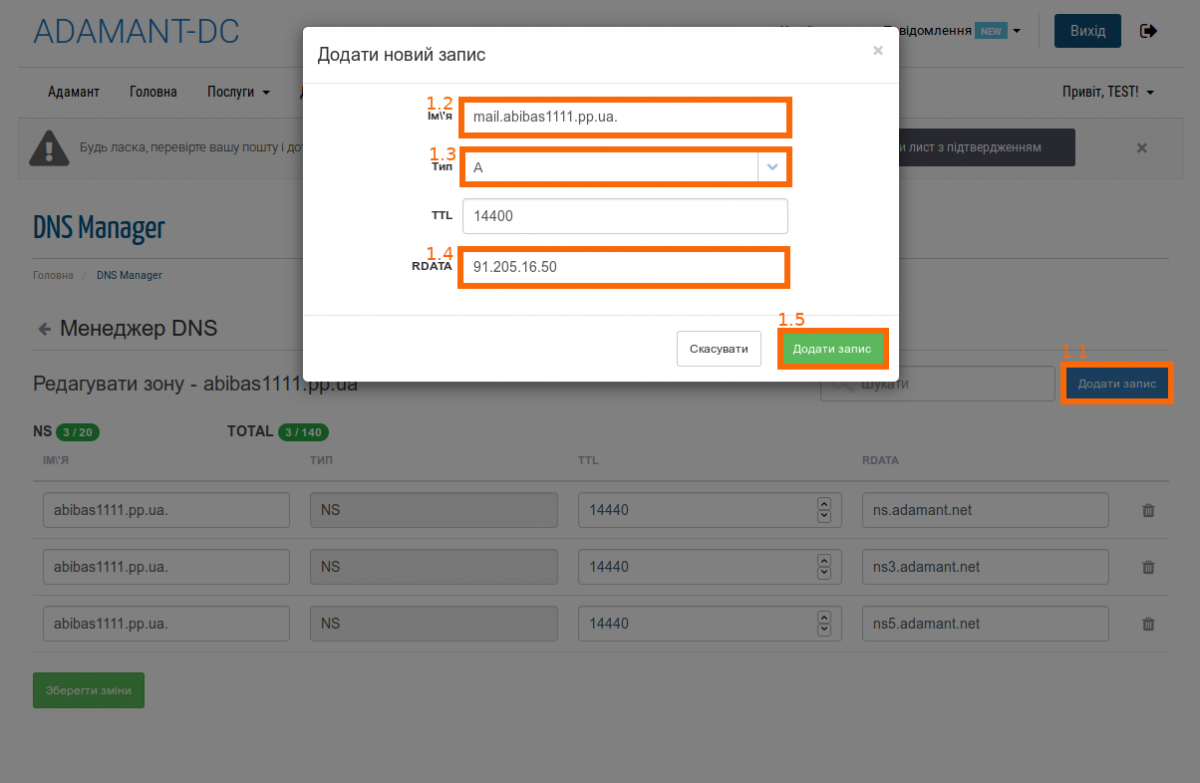
- Create an A-record by clicking on Add record (1.1)
- In the Name field, enter the subdomain of Your mail server (1.2). (in most cases, the subdomain of the mail server has the address: «mail.vashdomen.inet.ua.»)
- Select a type: «А» (1.3);
- Next to the RDATA field, enter the IPv4 address of the mail server (1.4)
- Check the information entered, if everything is correct, then confirm by clicking the green button «Add record«
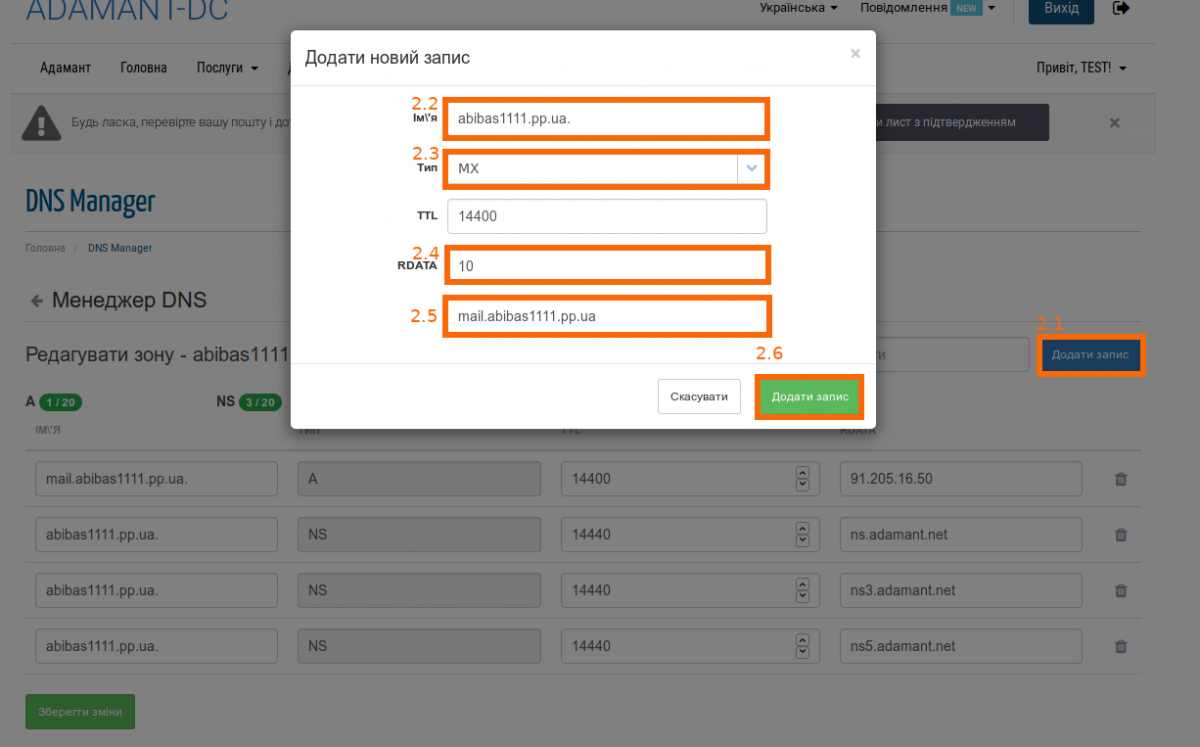
- Press again «Add record» to create MX-record (2.1);
- In the Name field, enter the domain address (2.2);
- Select the record type: «MX» (2.3);
- RDATA — here You need to specify the priority of the record, if it is the first and only MX-record for the domain, then the priority does not matter (the lower the value, the higher the priority, for example, adding mail1.vashdomen.inet.ua with priority 10 and mail2.vashdomen.inet.ua priority 20, we indicate that the first server to which the attempt to send mail will be made will be mail1.vashdomen.inet.ua, if for any reason the server with the highest priority will be unreachable and the attempt to send mail will fail, then the attempt will be made to the server with the next priority, i.e. to mail2.vashdomen.inet.ua) (2.4);
- In the last field, enter the subdomain address of the mail server for which You previously created А-record under this guide (2.5);
- Check the information entered, if everything is correct, then confirm by clicking the green button «Add record» (2.6)
- Finish making changes by clicking the button «Save changes«
Please note that the information filled in the screenshots is for example only, and You will need to enter own data.
It can take up to 72 hours for DNS servers to fully update the new records, and some servers will be able to see new information within 4 to 8 hours.